A control measure is how a commander imposes order on space and time without talking. A single line drawn on a shared map replaces a paragraph of radio traffic. "Hold at the ridge, don't cross it until I say" becomes one labelled line that every subordinate reads the same way. That is the whole purpose: coordinate action without continuous communication, so the plan keeps working when the radios don't.
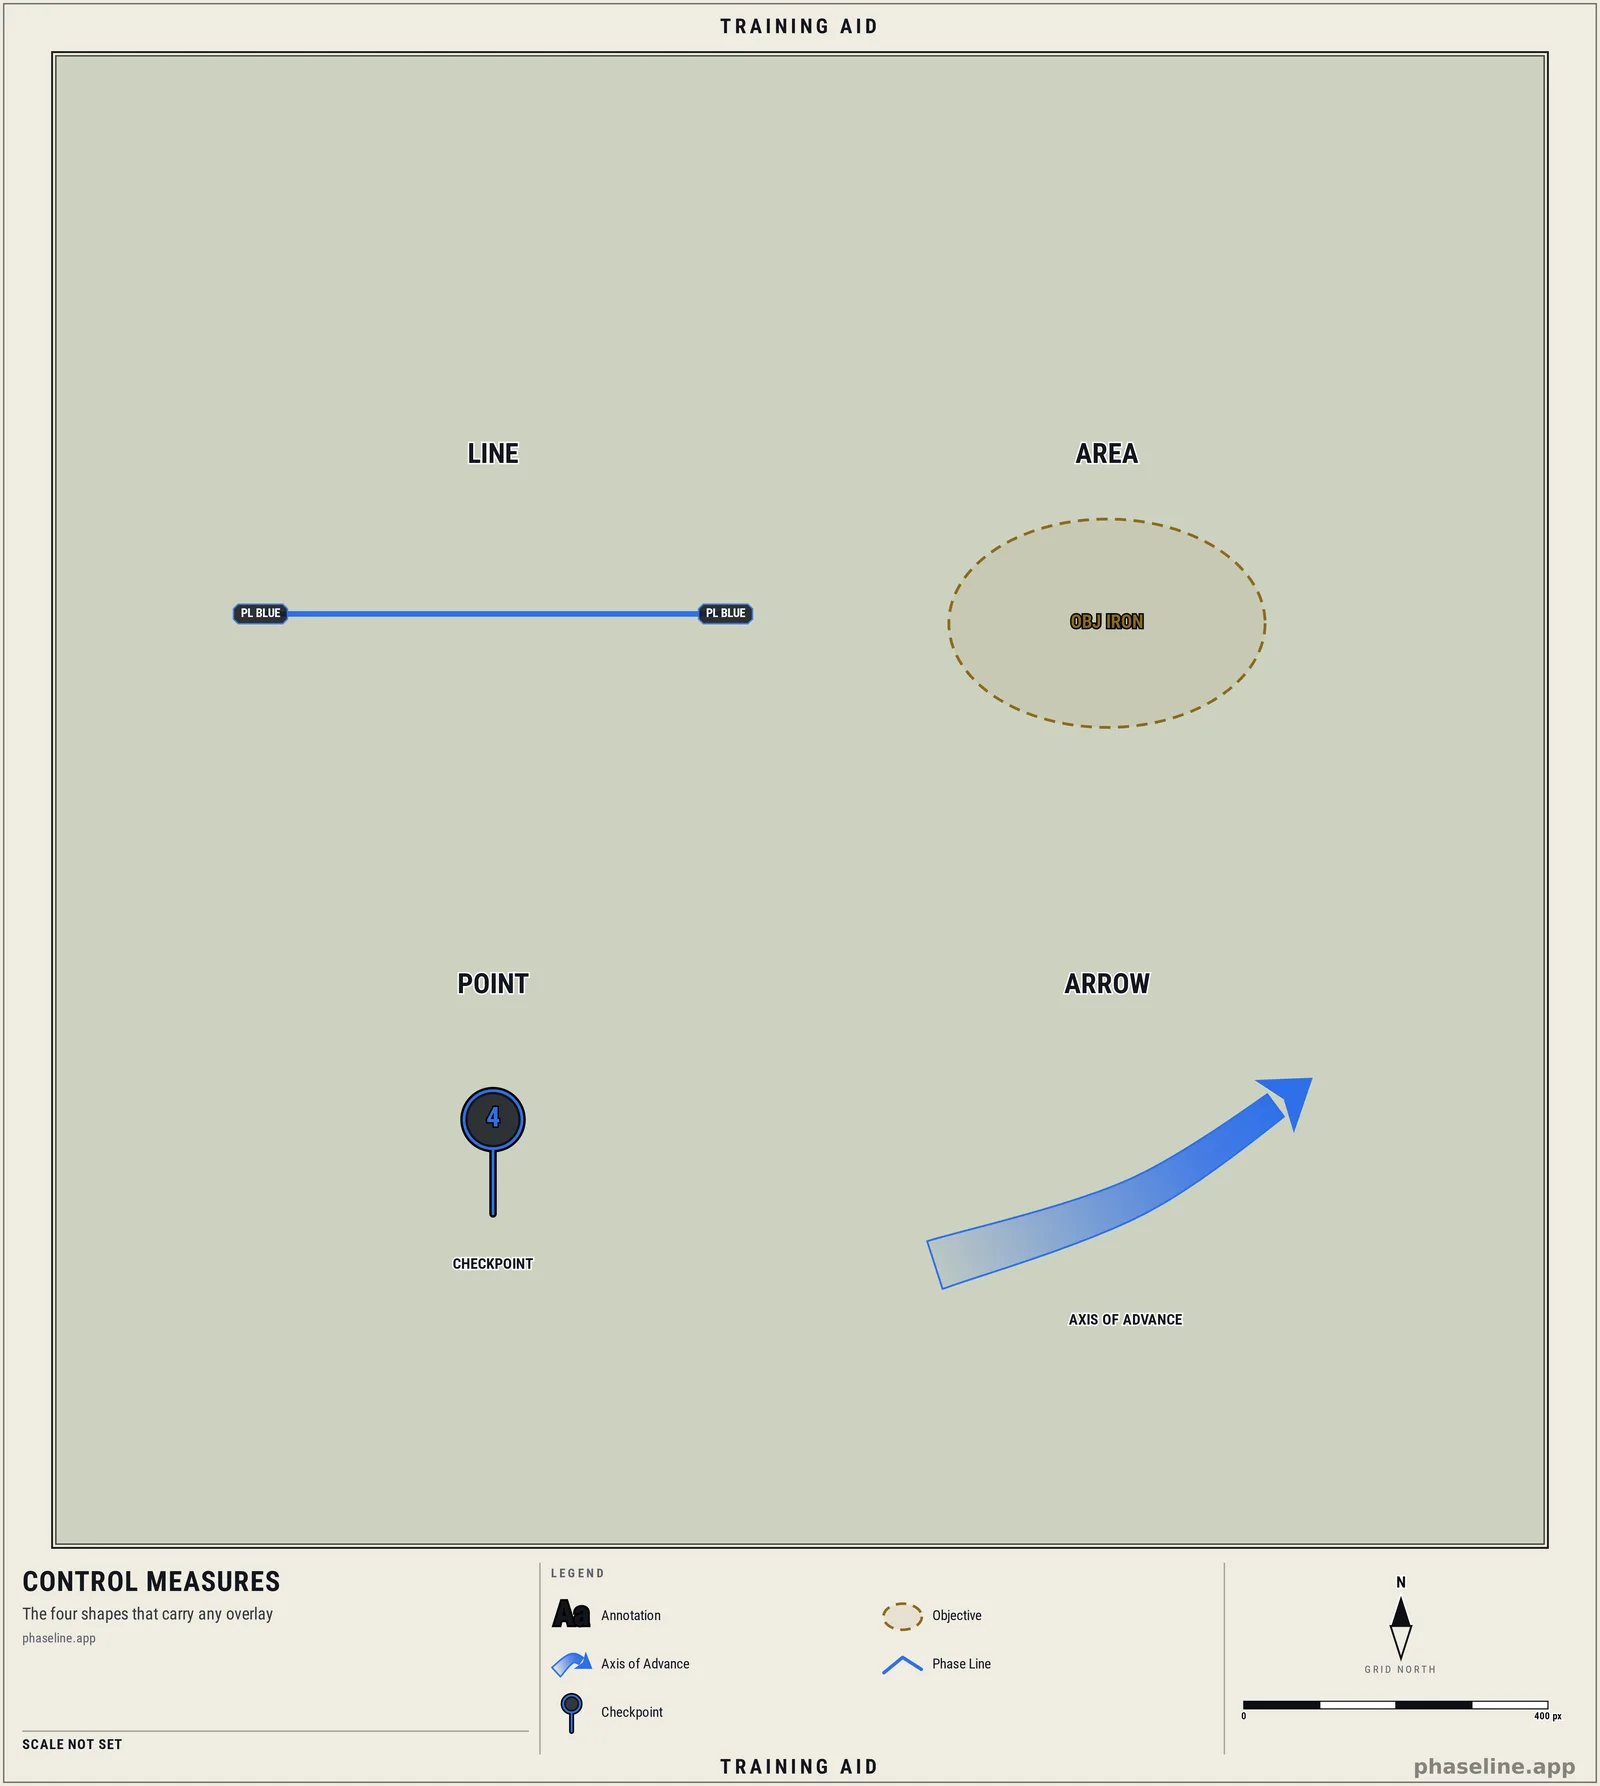
Doctrine calls the ones you can draw graphic control measures. There are dozens of them, and the field manuals list them alphabetically, which is exactly the wrong way to learn them. Learn them by shape instead. Almost every control measure is one of four things:
- a line that partitions space and gates movement,
- an area that assigns a piece of ground and a responsibility,
- a point that names a single spot precisely, or
- an arrow that dictates a direction.
Get the four shapes and you can read almost any overlay. Here they are, in pictures.
1. Lines — they partition space and gate movement
A line answers the question "where does one thing end and the next begin?" — and, just as often, "who is allowed past here, and when?"
Boundary
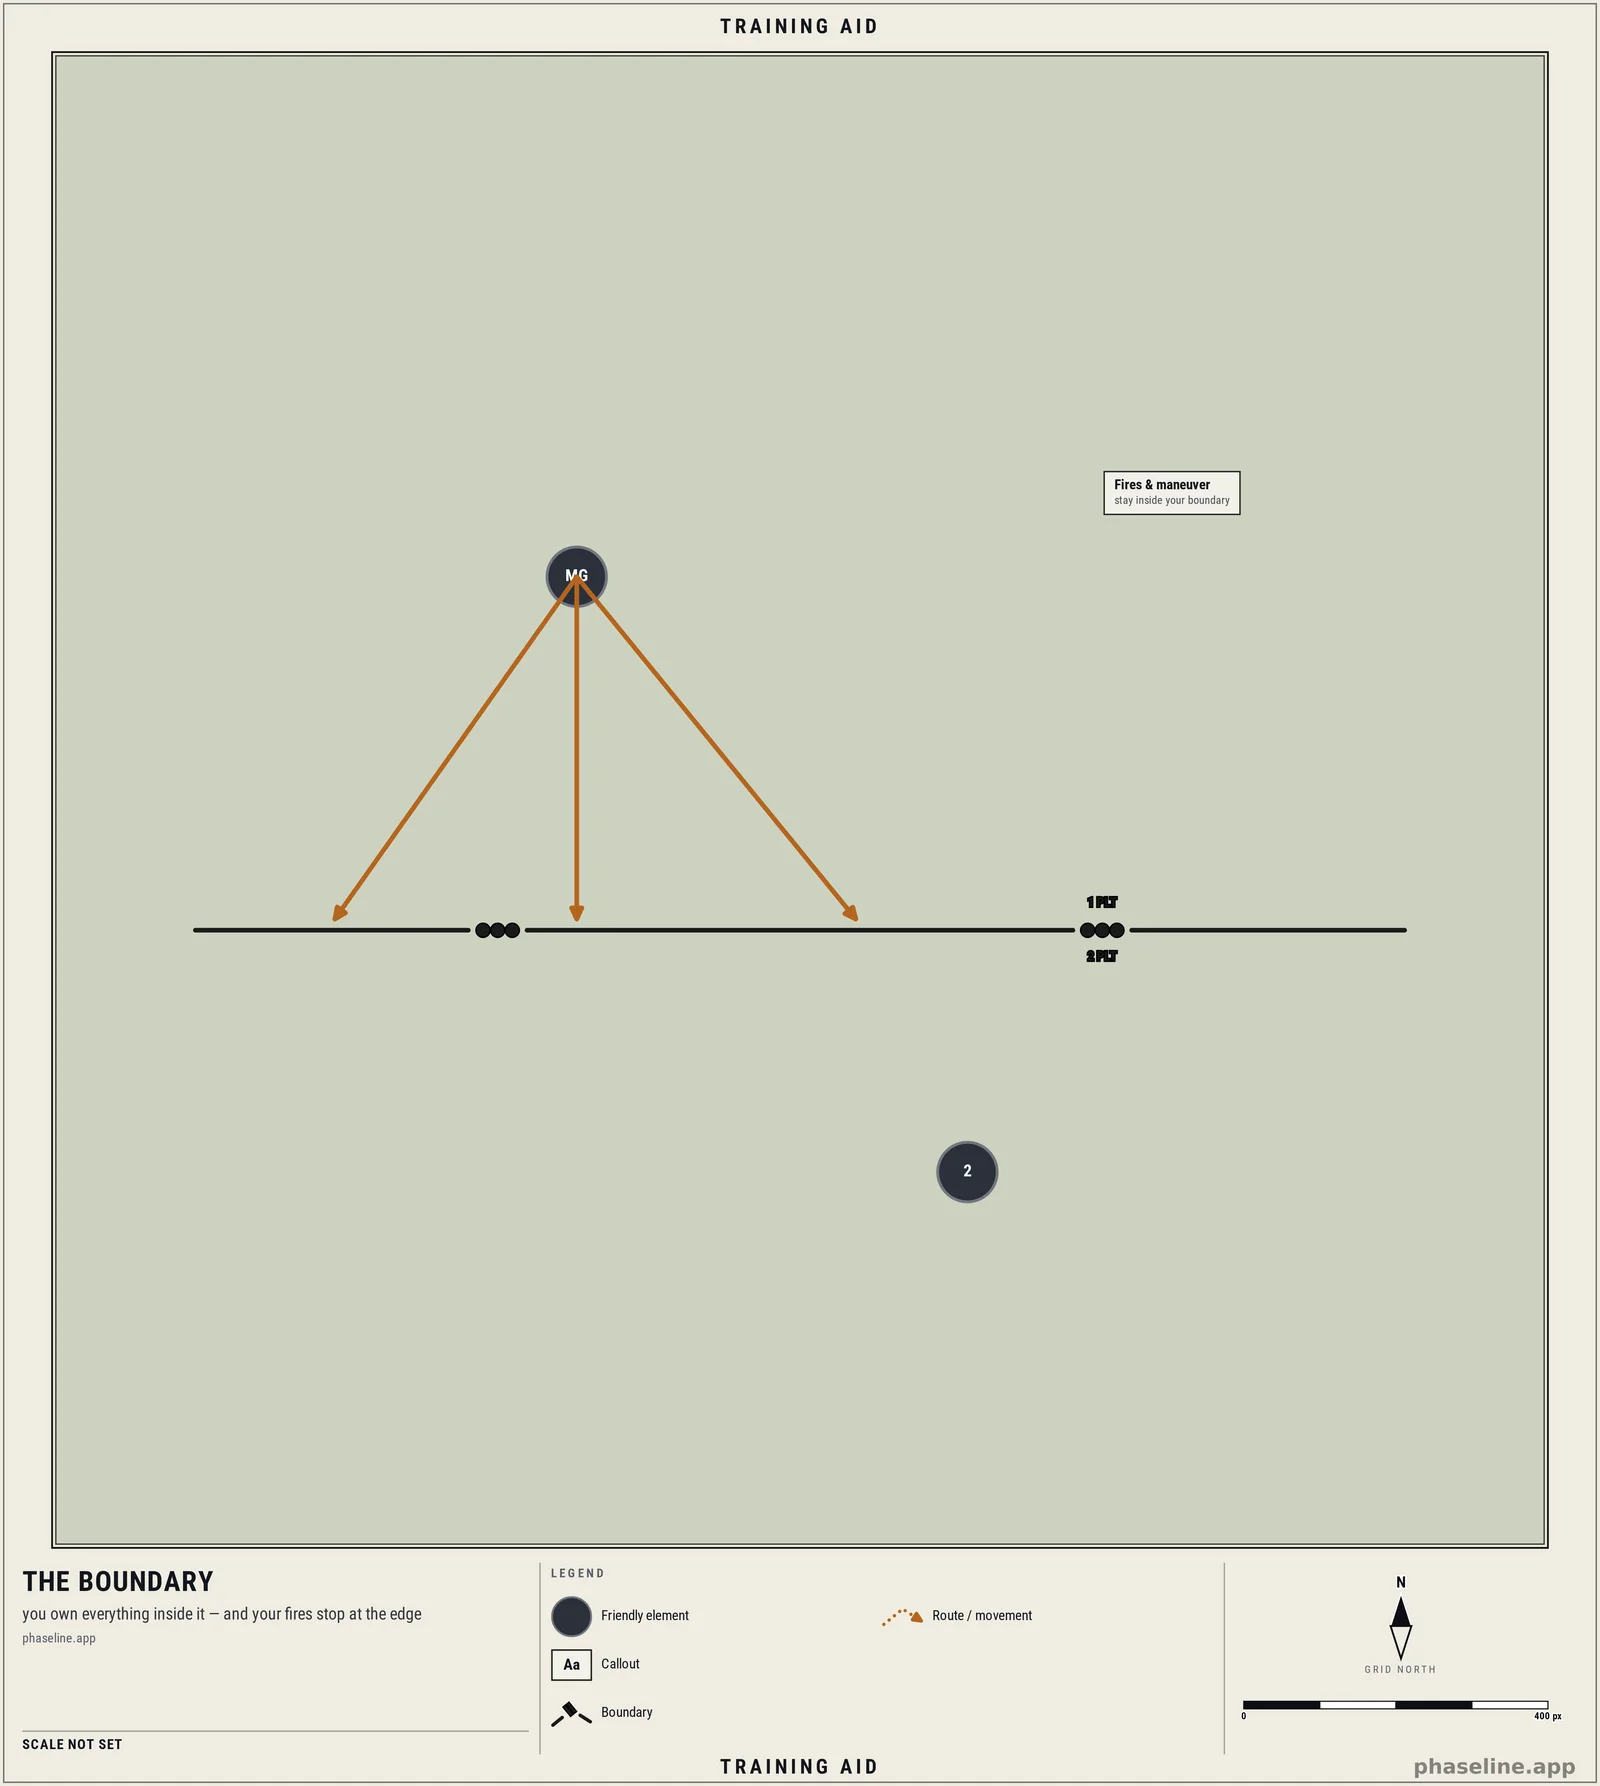
The boundary is the most important control measure on the map, and the one enthusiasts skip first. A boundary encloses a unit's area of operations: the ground it owns. Inside its boundary a unit maneuvers and fires freely; it does not maneuver or fire across the boundary without coordinating with the unit on the other side. That single rule is what prevents two friendly elements from shooting into the same wood line from ninety degrees apart.
A boundary is drawn as a line with the owning units labelled on either side. It is restrictive by nature: it protects, but it also constrains — nothing good happens when a support element's rounds cross a boundary nobody cleared.
Phase Line (PL)
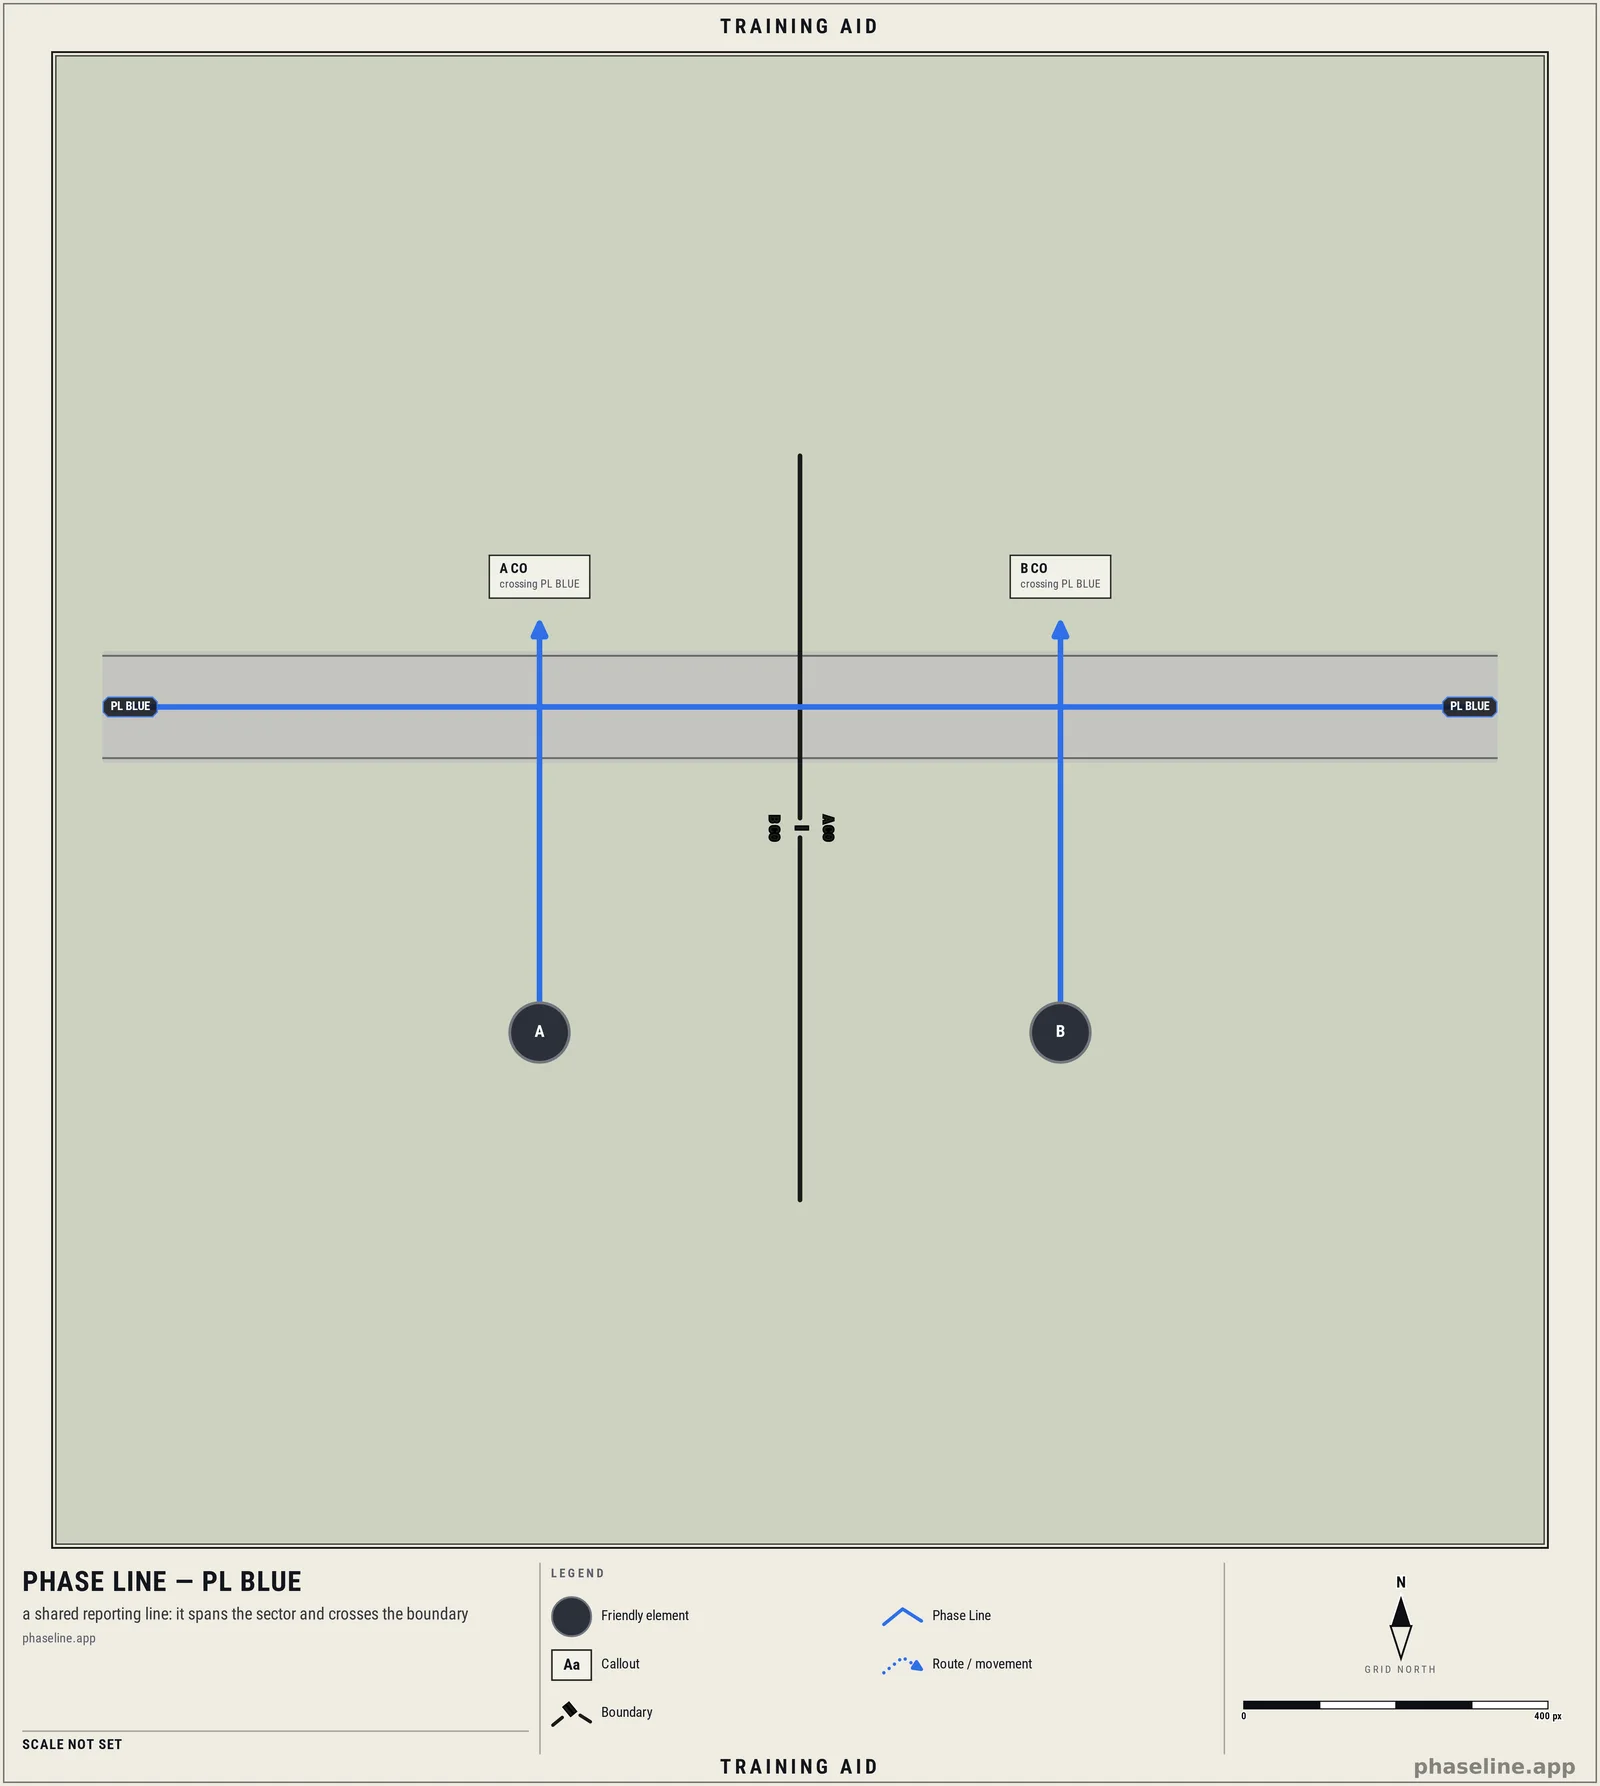
A phase line is a line you can point to on the ground — a road, a ridge, a river — used to control and report movement. Units report crossing it ("crossing PL BLUE") so the commander tracks progress without asking. A phase line is not a restriction by itself; it becomes one only when the order attaches a condition to it ("do not cross PL BLUE until the support element is set").
The distinction between a phase line and a boundary is the single most common mix-up in amateur overlays — they look similar and do opposite jobs. (That mix-up will get its own post, Why a phase line is not a boundary. Until then, the handbook entries Phase lines and Boundaries draw both lines on one sector map.)
Line of Departure (LD) and Limit of Advance (LOA)
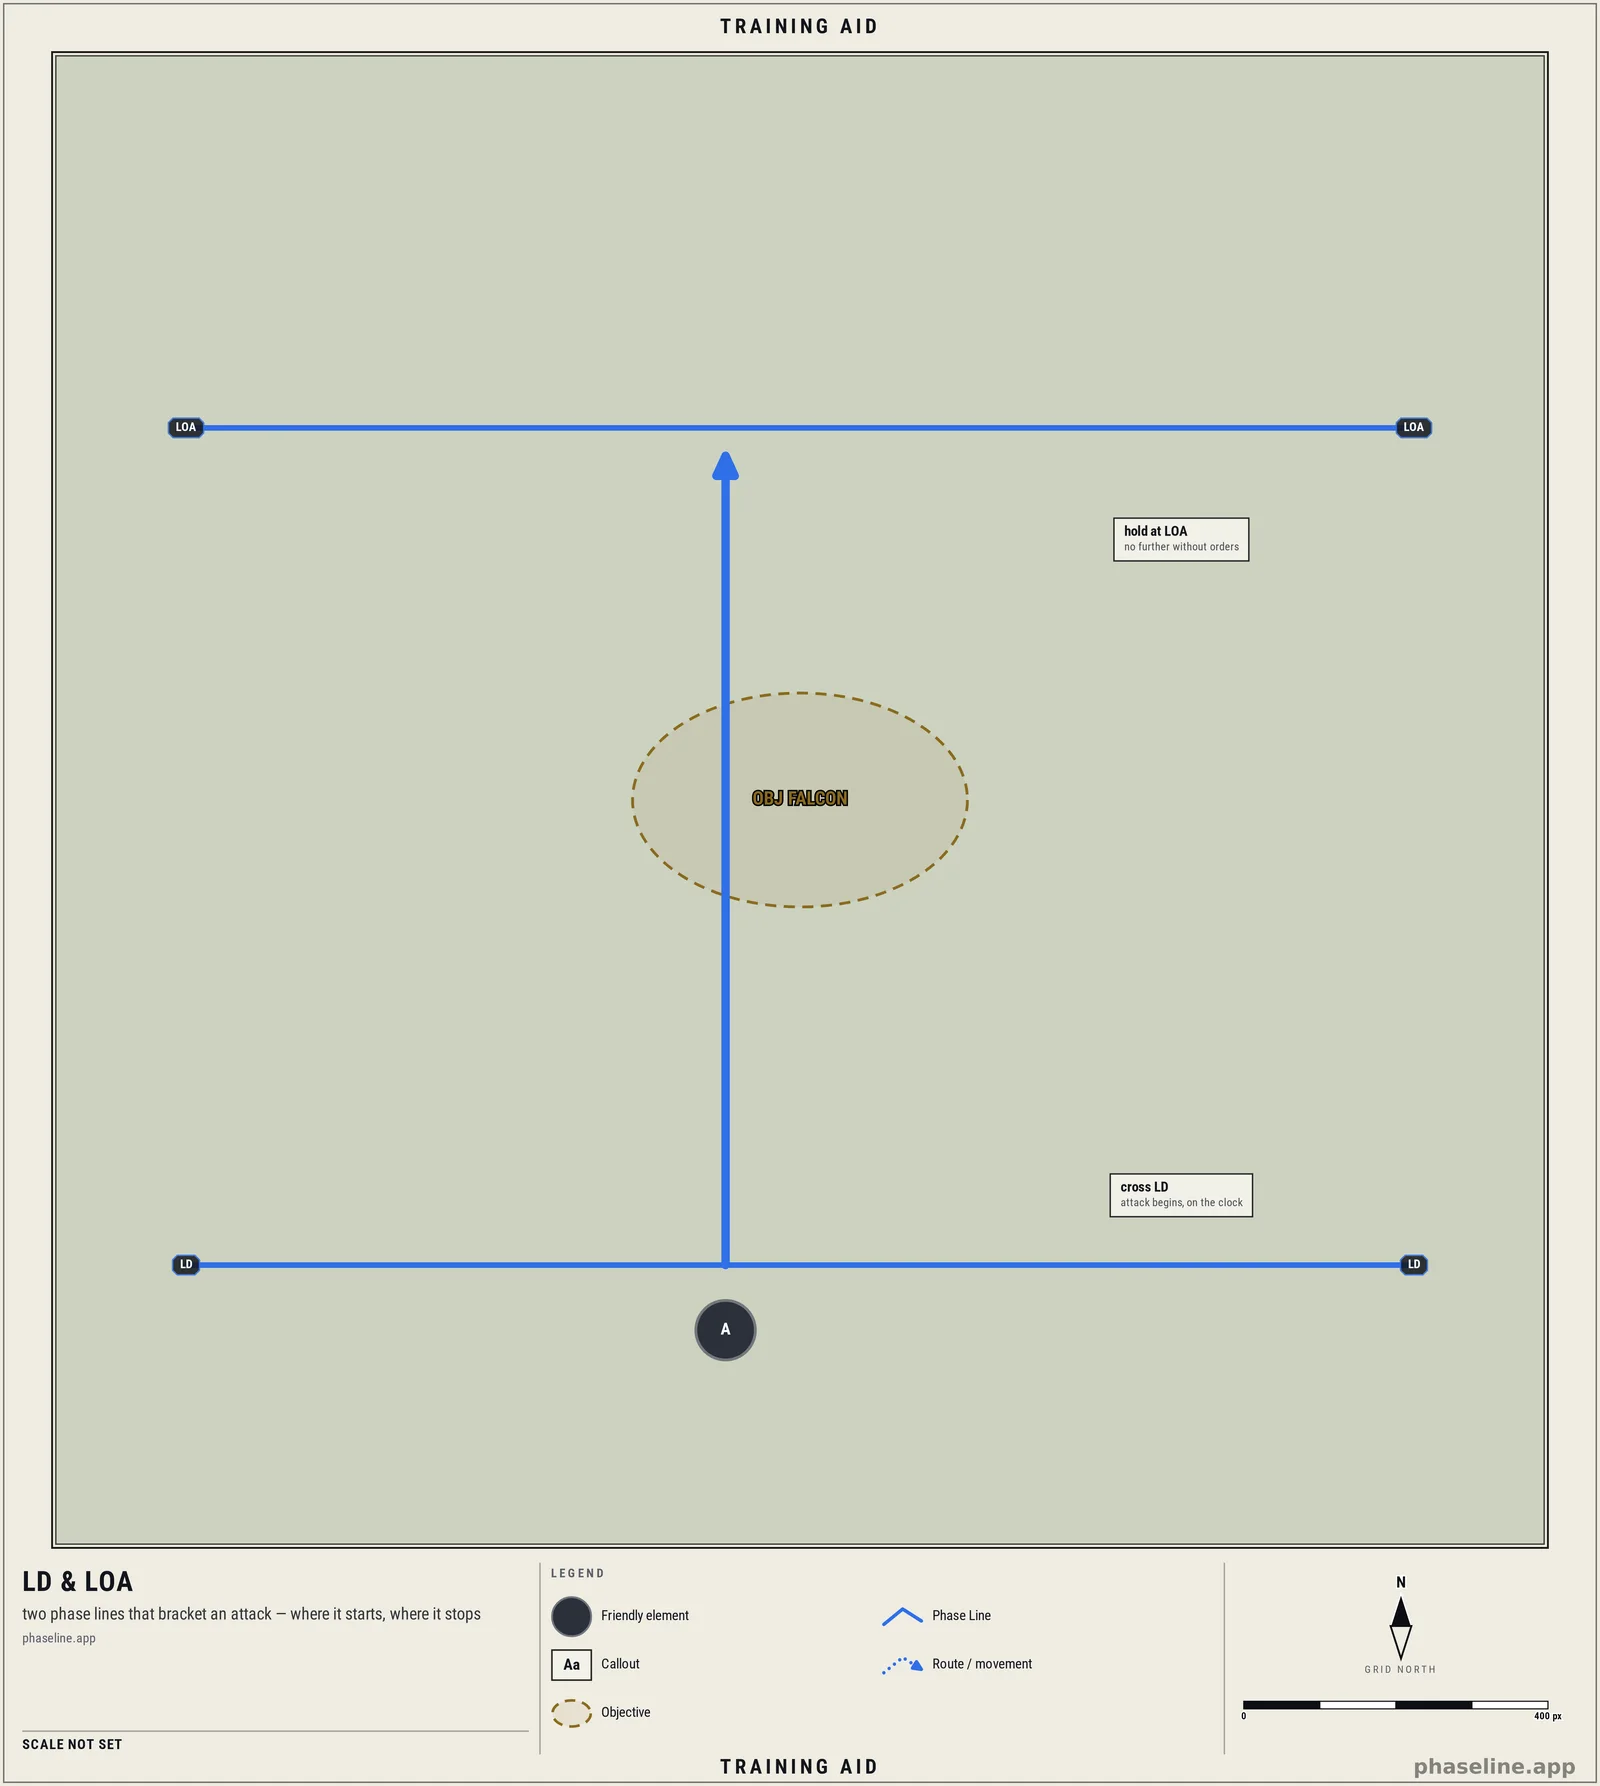
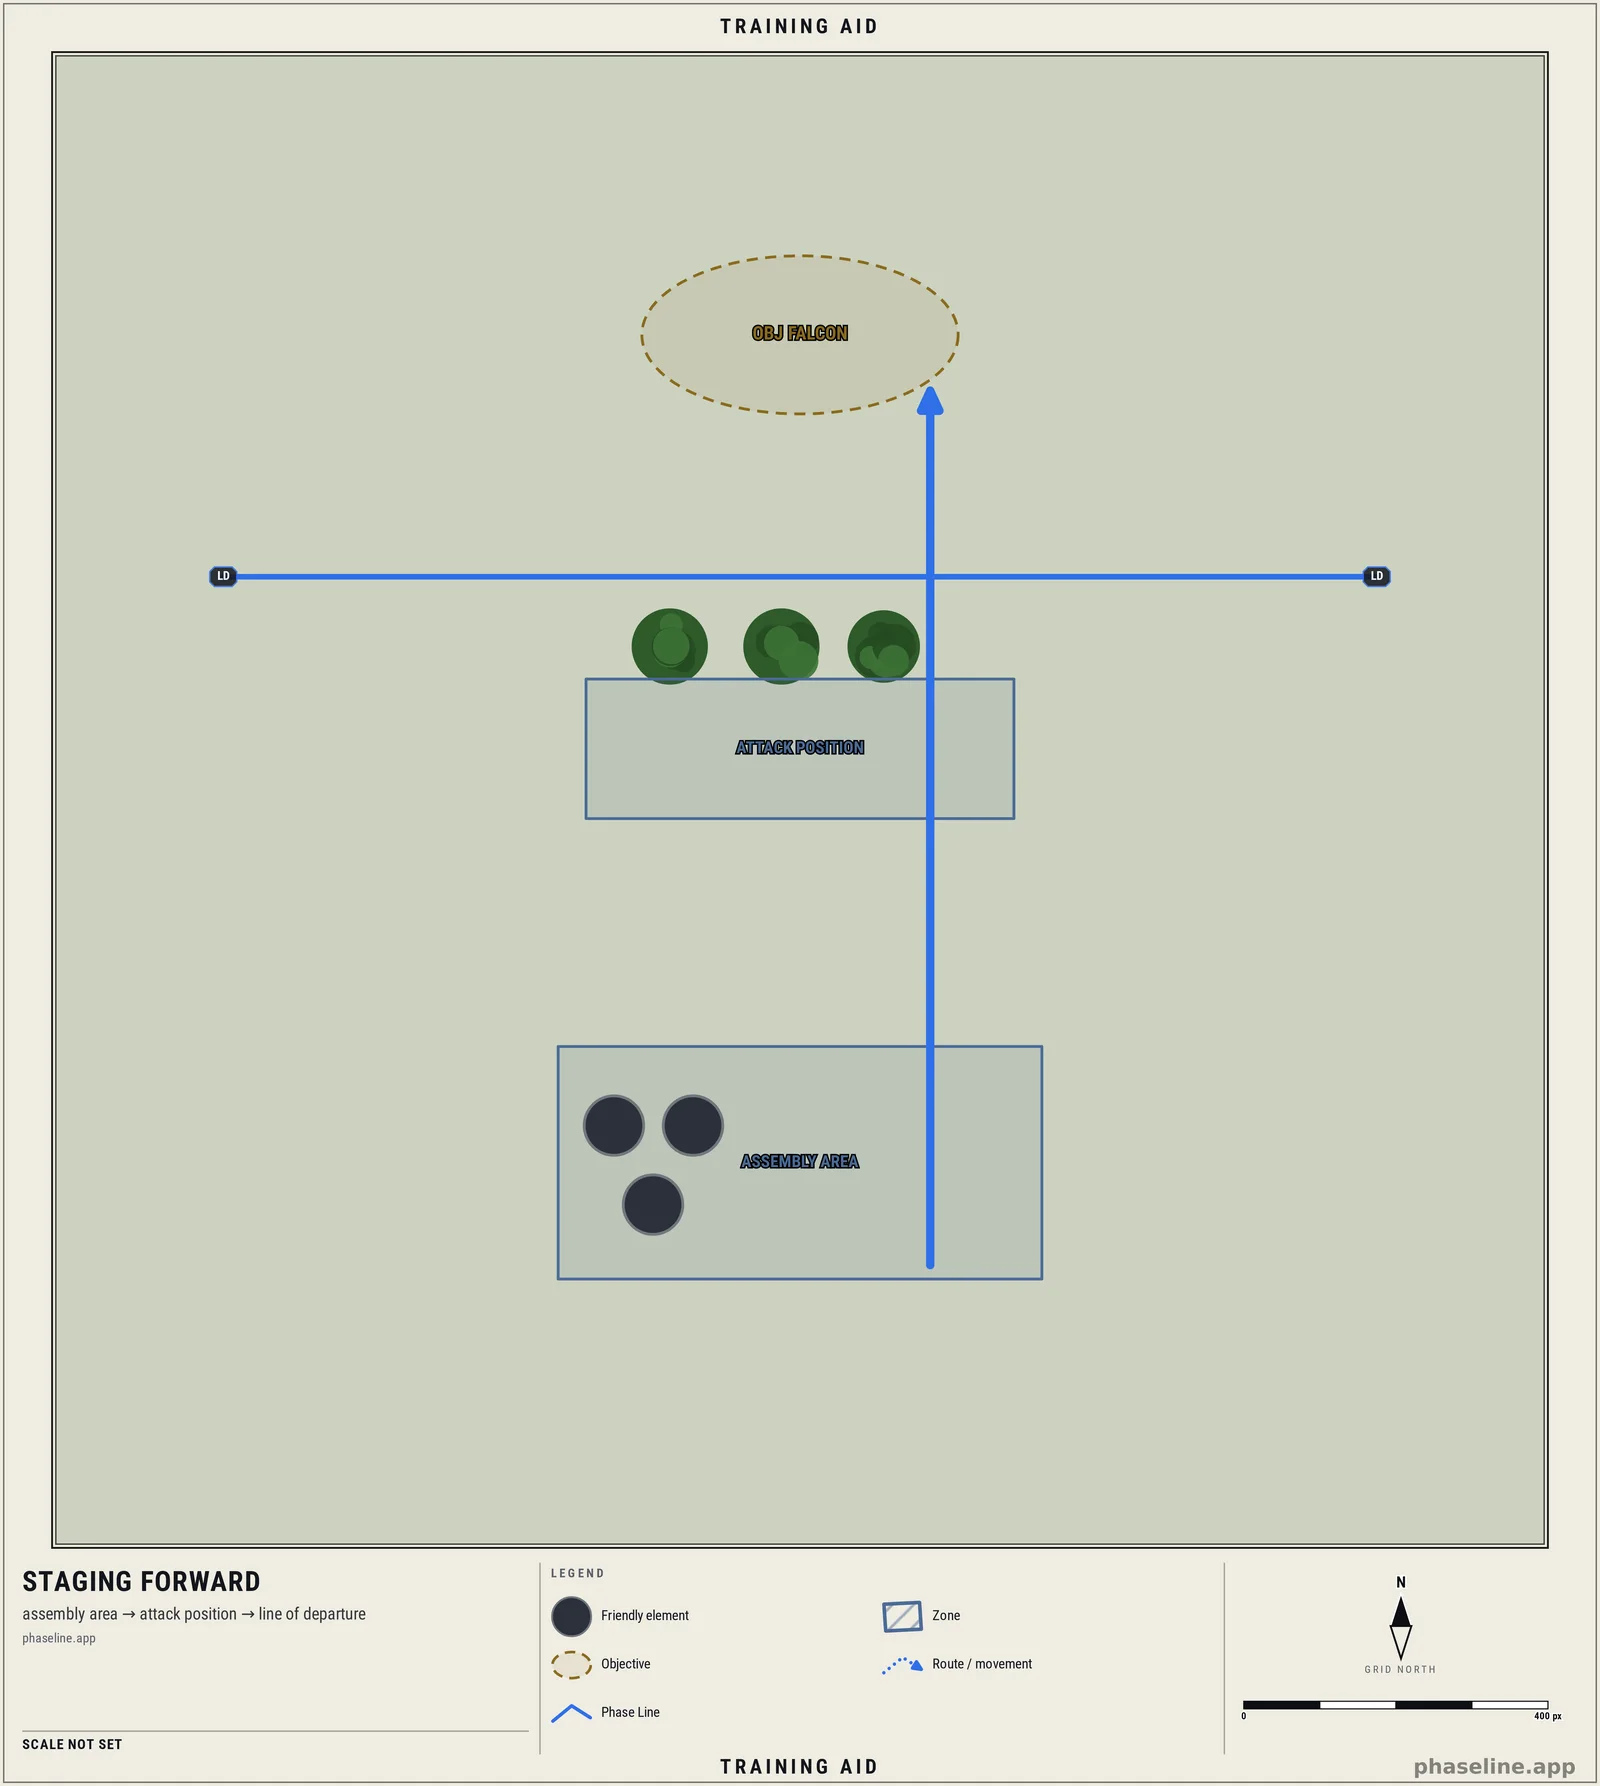
Two more control lines bracket an attack. The line of departure is where the attack formally begins — cross it and you are committed and on the clock. The limit of advance — itself a phase line — is the line you do not go beyond without new orders; it keeps a successful assault from over-running into friendly fires or a follow-on unit's ground.
Together they turn "attack toward the village" into a bounded problem with a defined start and a defined stop.
2. Areas — they assign ground and a responsibility
Where a line is a fence, an area is a box with your name on it. An area control measure hands a unit a piece of ground and says: this is yours to hold, clear, or stage in.
Objective (OBJ)
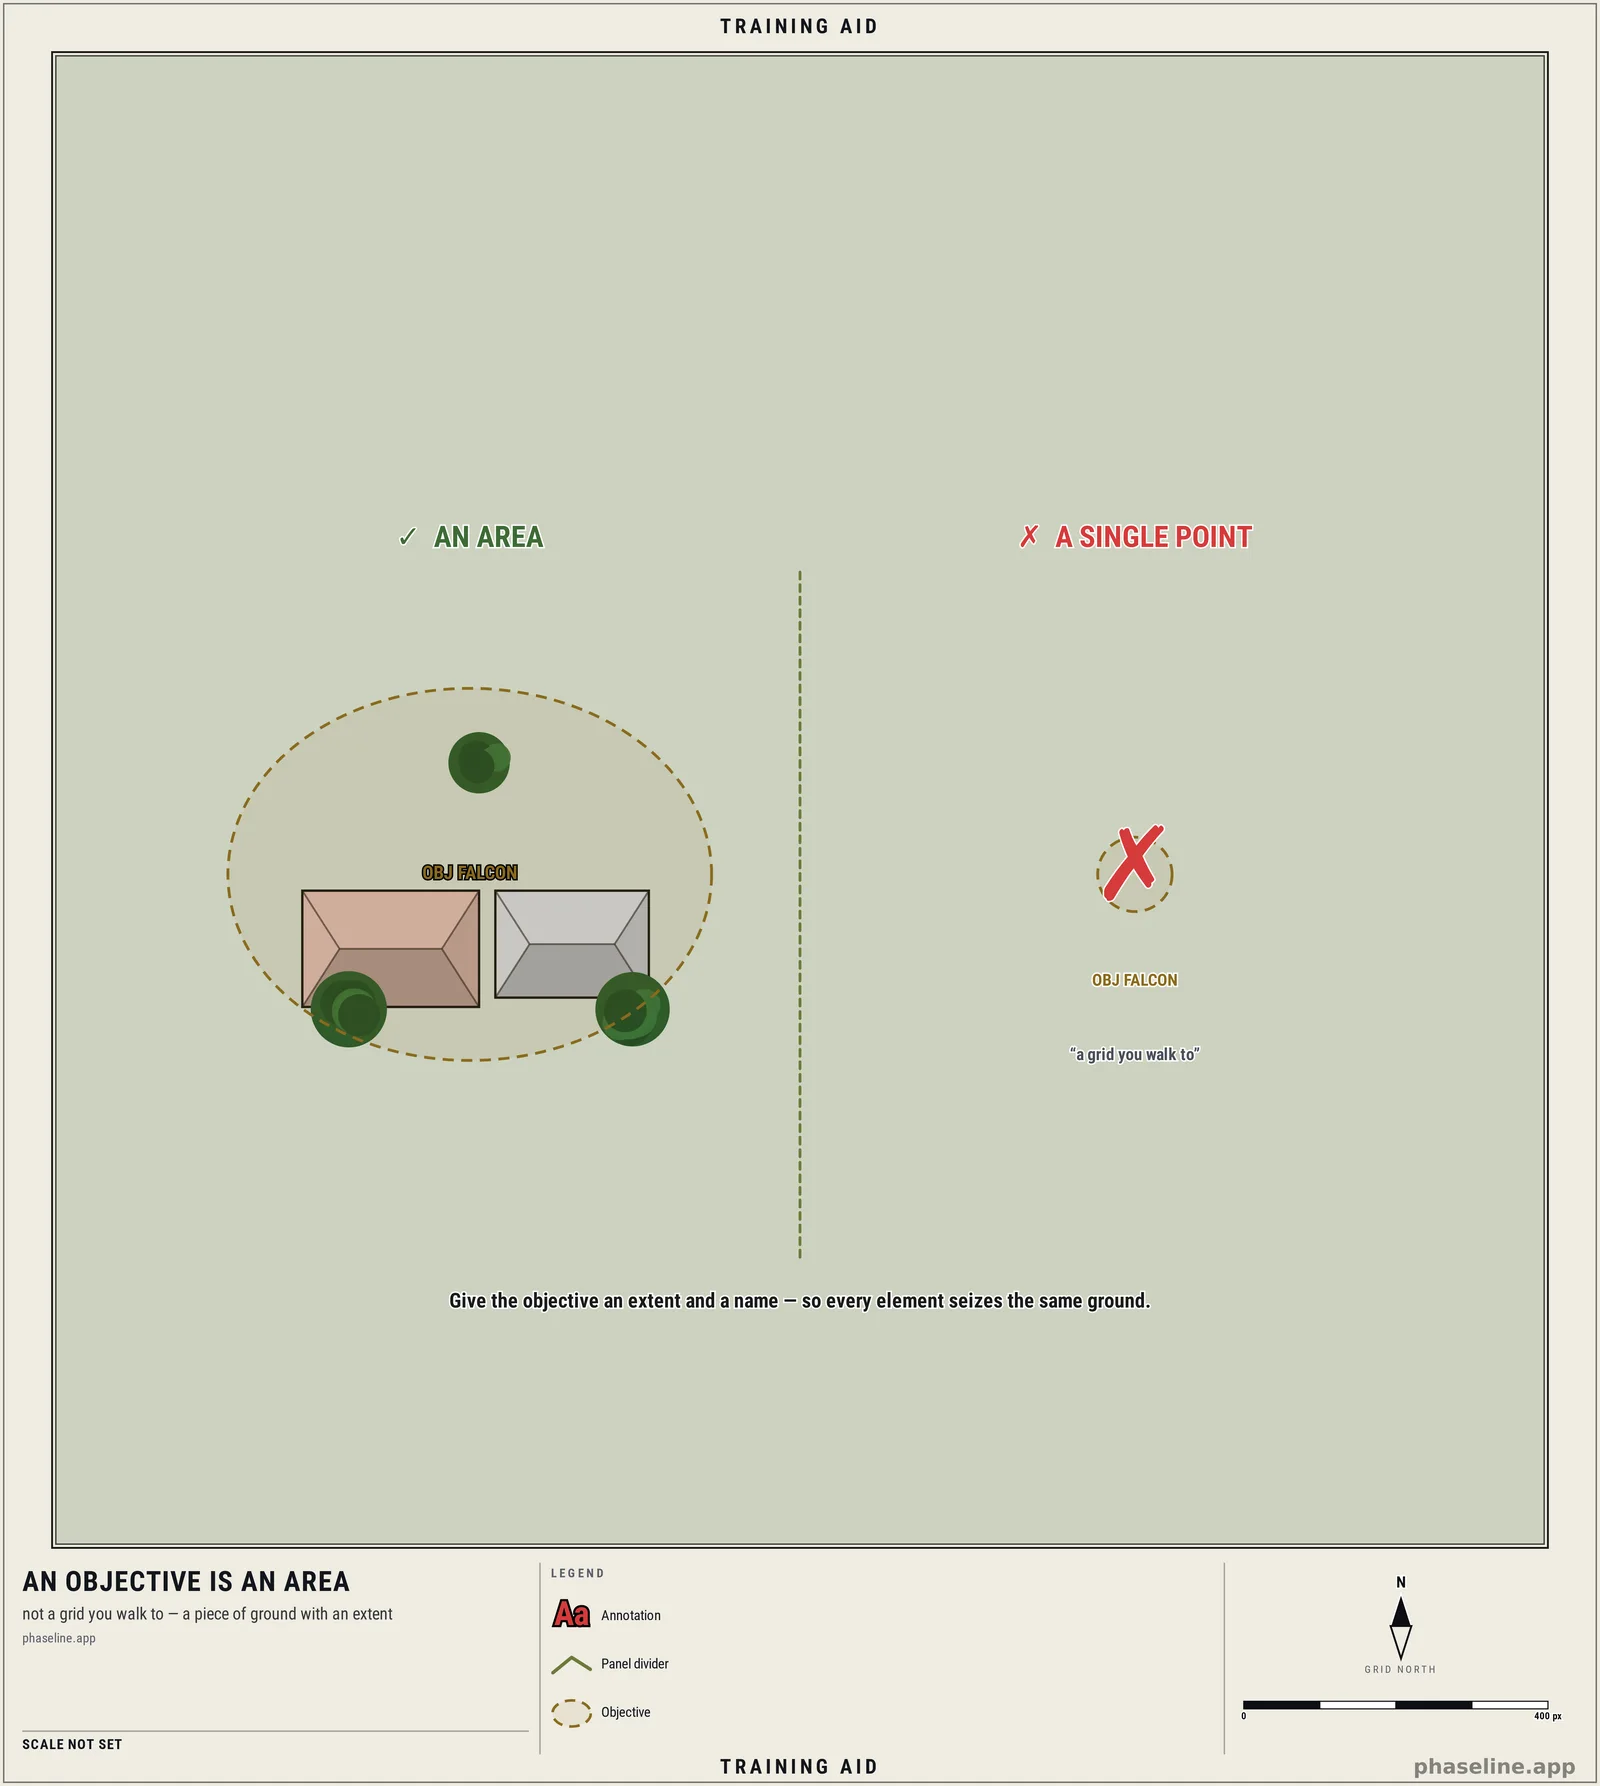
An objective is the defined area a unit is directed to seize, secure, or clear — the reason the operation exists. The important word is area. An objective is not a grid coordinate you walk to; it is a piece of ground with an extent, given a name (OBJ FALCON) so everyone refers to the same dirt.
Assembly Area (AA) and Attack Position
Before the attack, units stage. The assembly area is where a force gathers, maintains, and prepares — well back, out of contact. The attack position is the last covered and concealed position before the line of departure: the final held breath before commitment.
Engagement Area (EA) and sectors of fire (the defence)
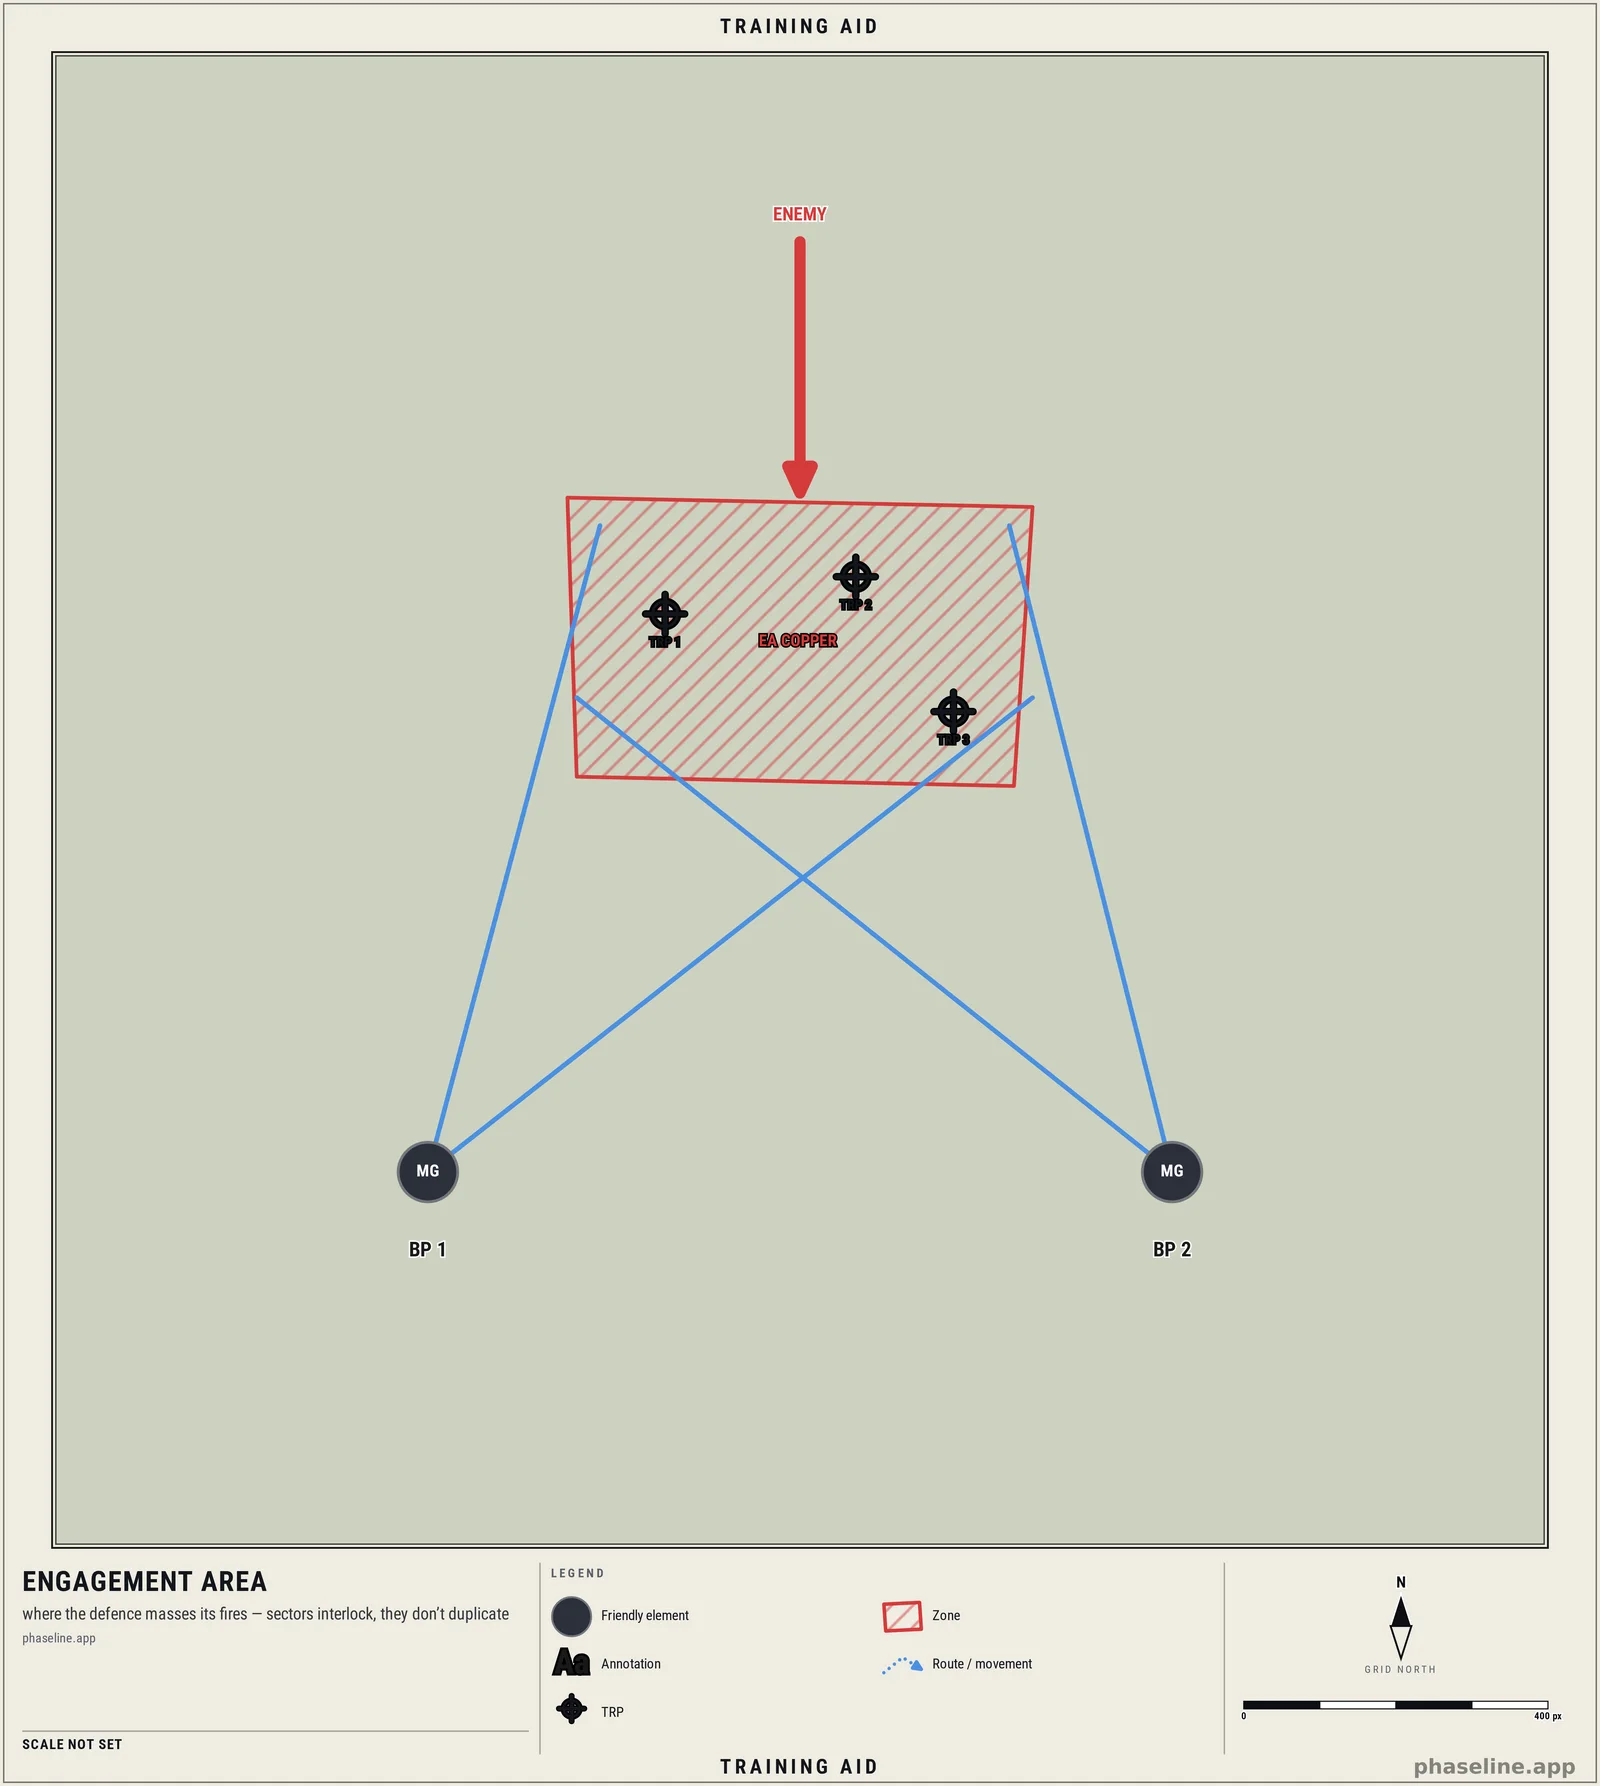
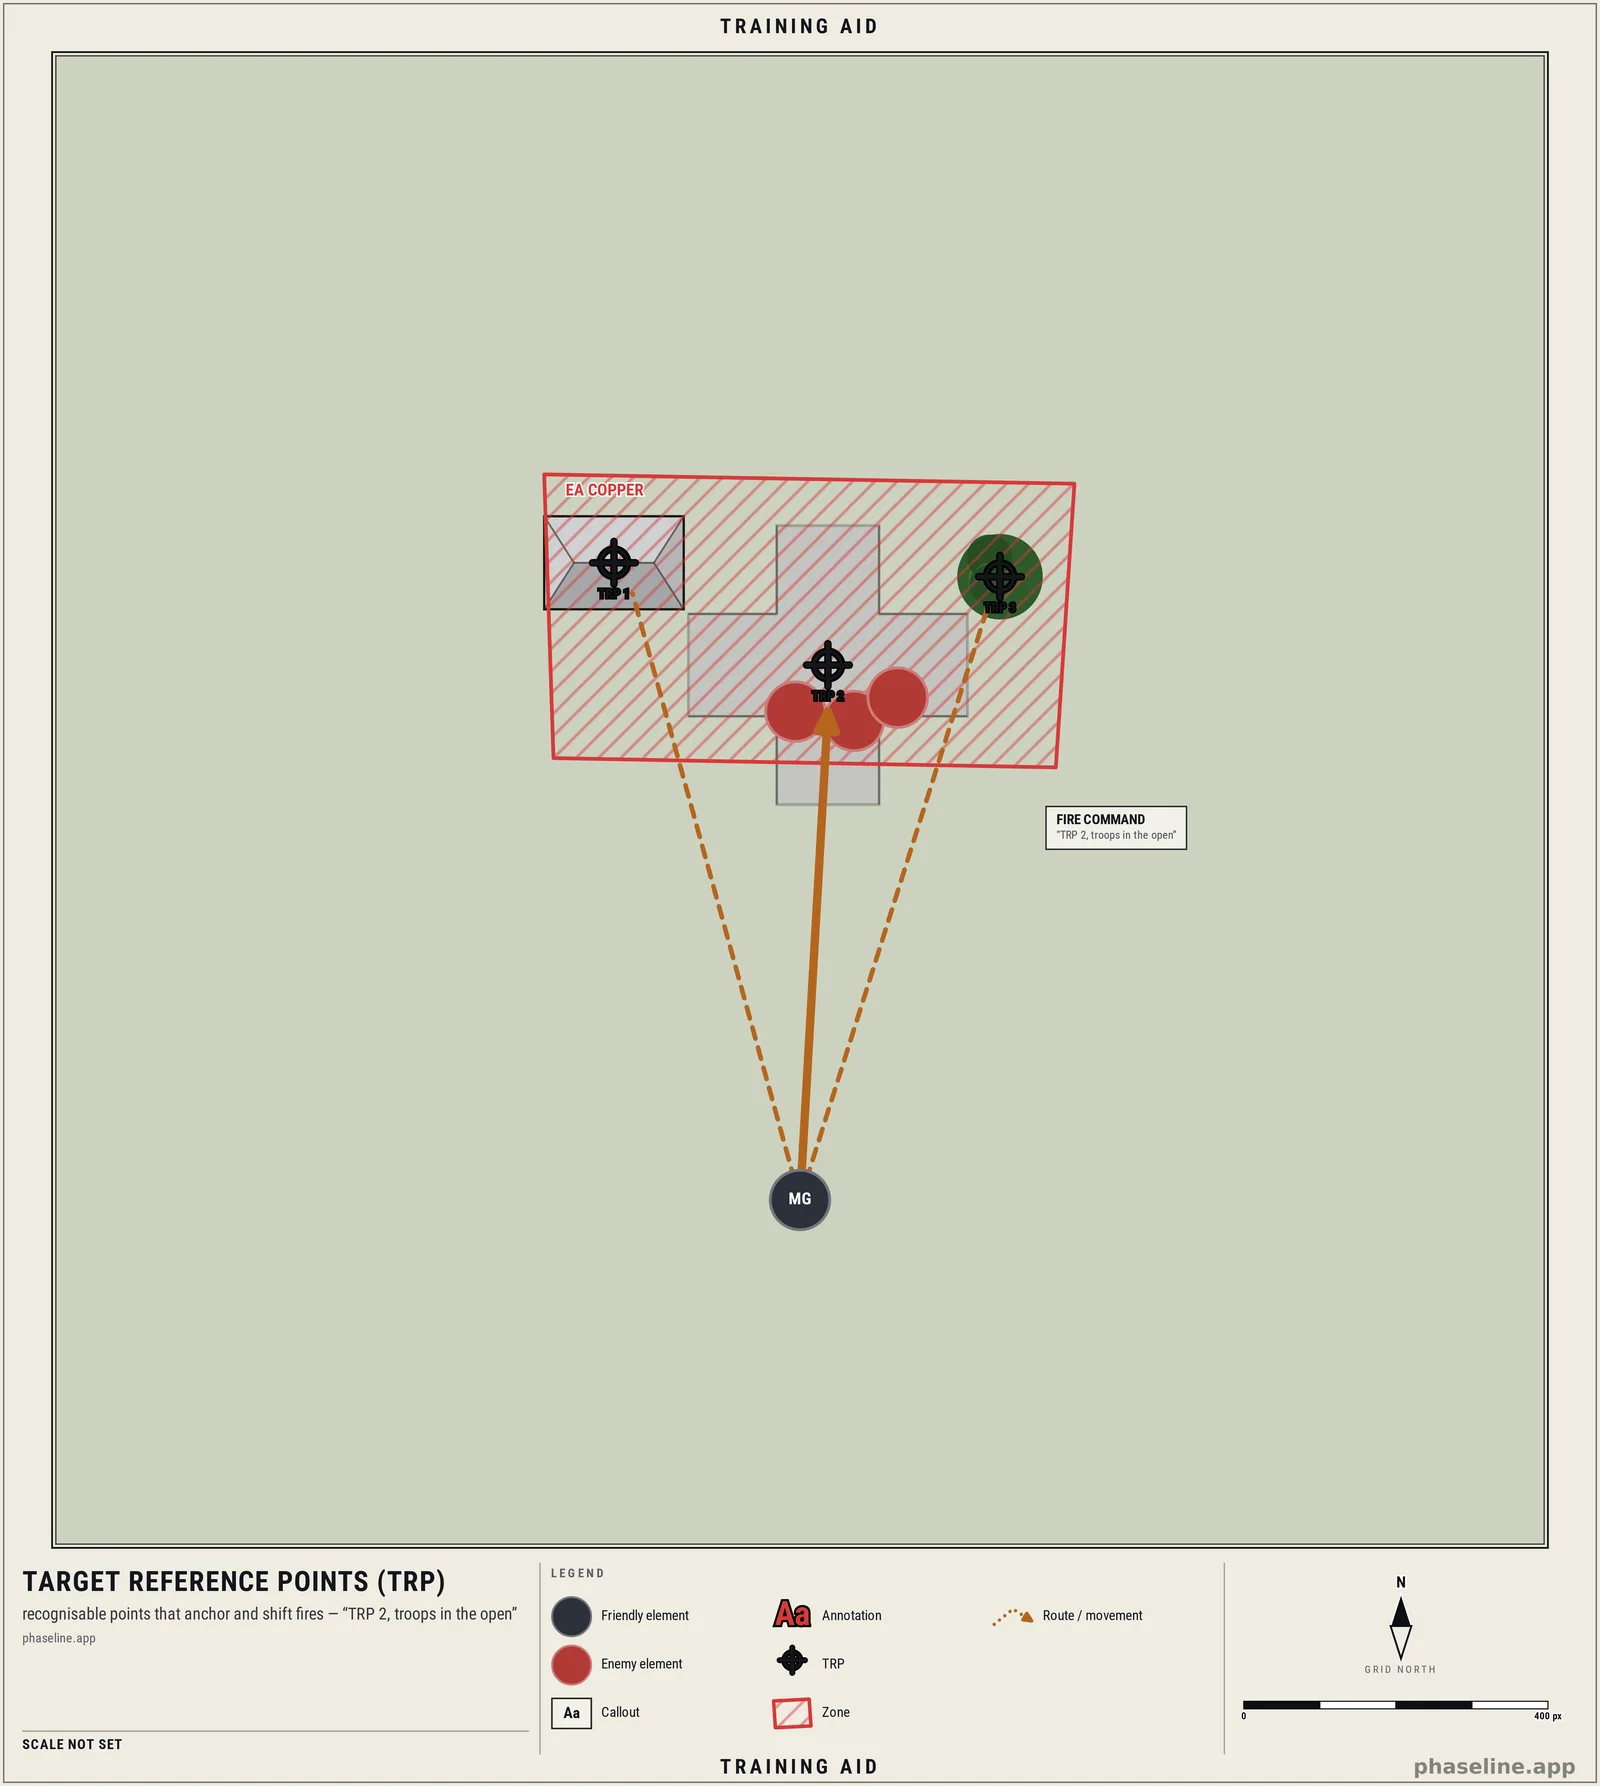
On the defence, the mirror image of the objective is the engagement area: the ground where you intend to destroy the enemy, chosen so your weapons can mass fires into it. Each position is assigned a sector of fire — left and right limits that divide the EA up so the whole force covers it without every gun pointing at the same tank. (The arithmetic of dividing an EA is its own post: Sectors of fire and the arithmetic of suppression.)
3. Points — they name one spot, exactly
A point control measure removes ambiguity from a single location. Its whole value is that when someone says the name, everyone puts their finger on the same square metre.
Checkpoint (CP) and Contact Point
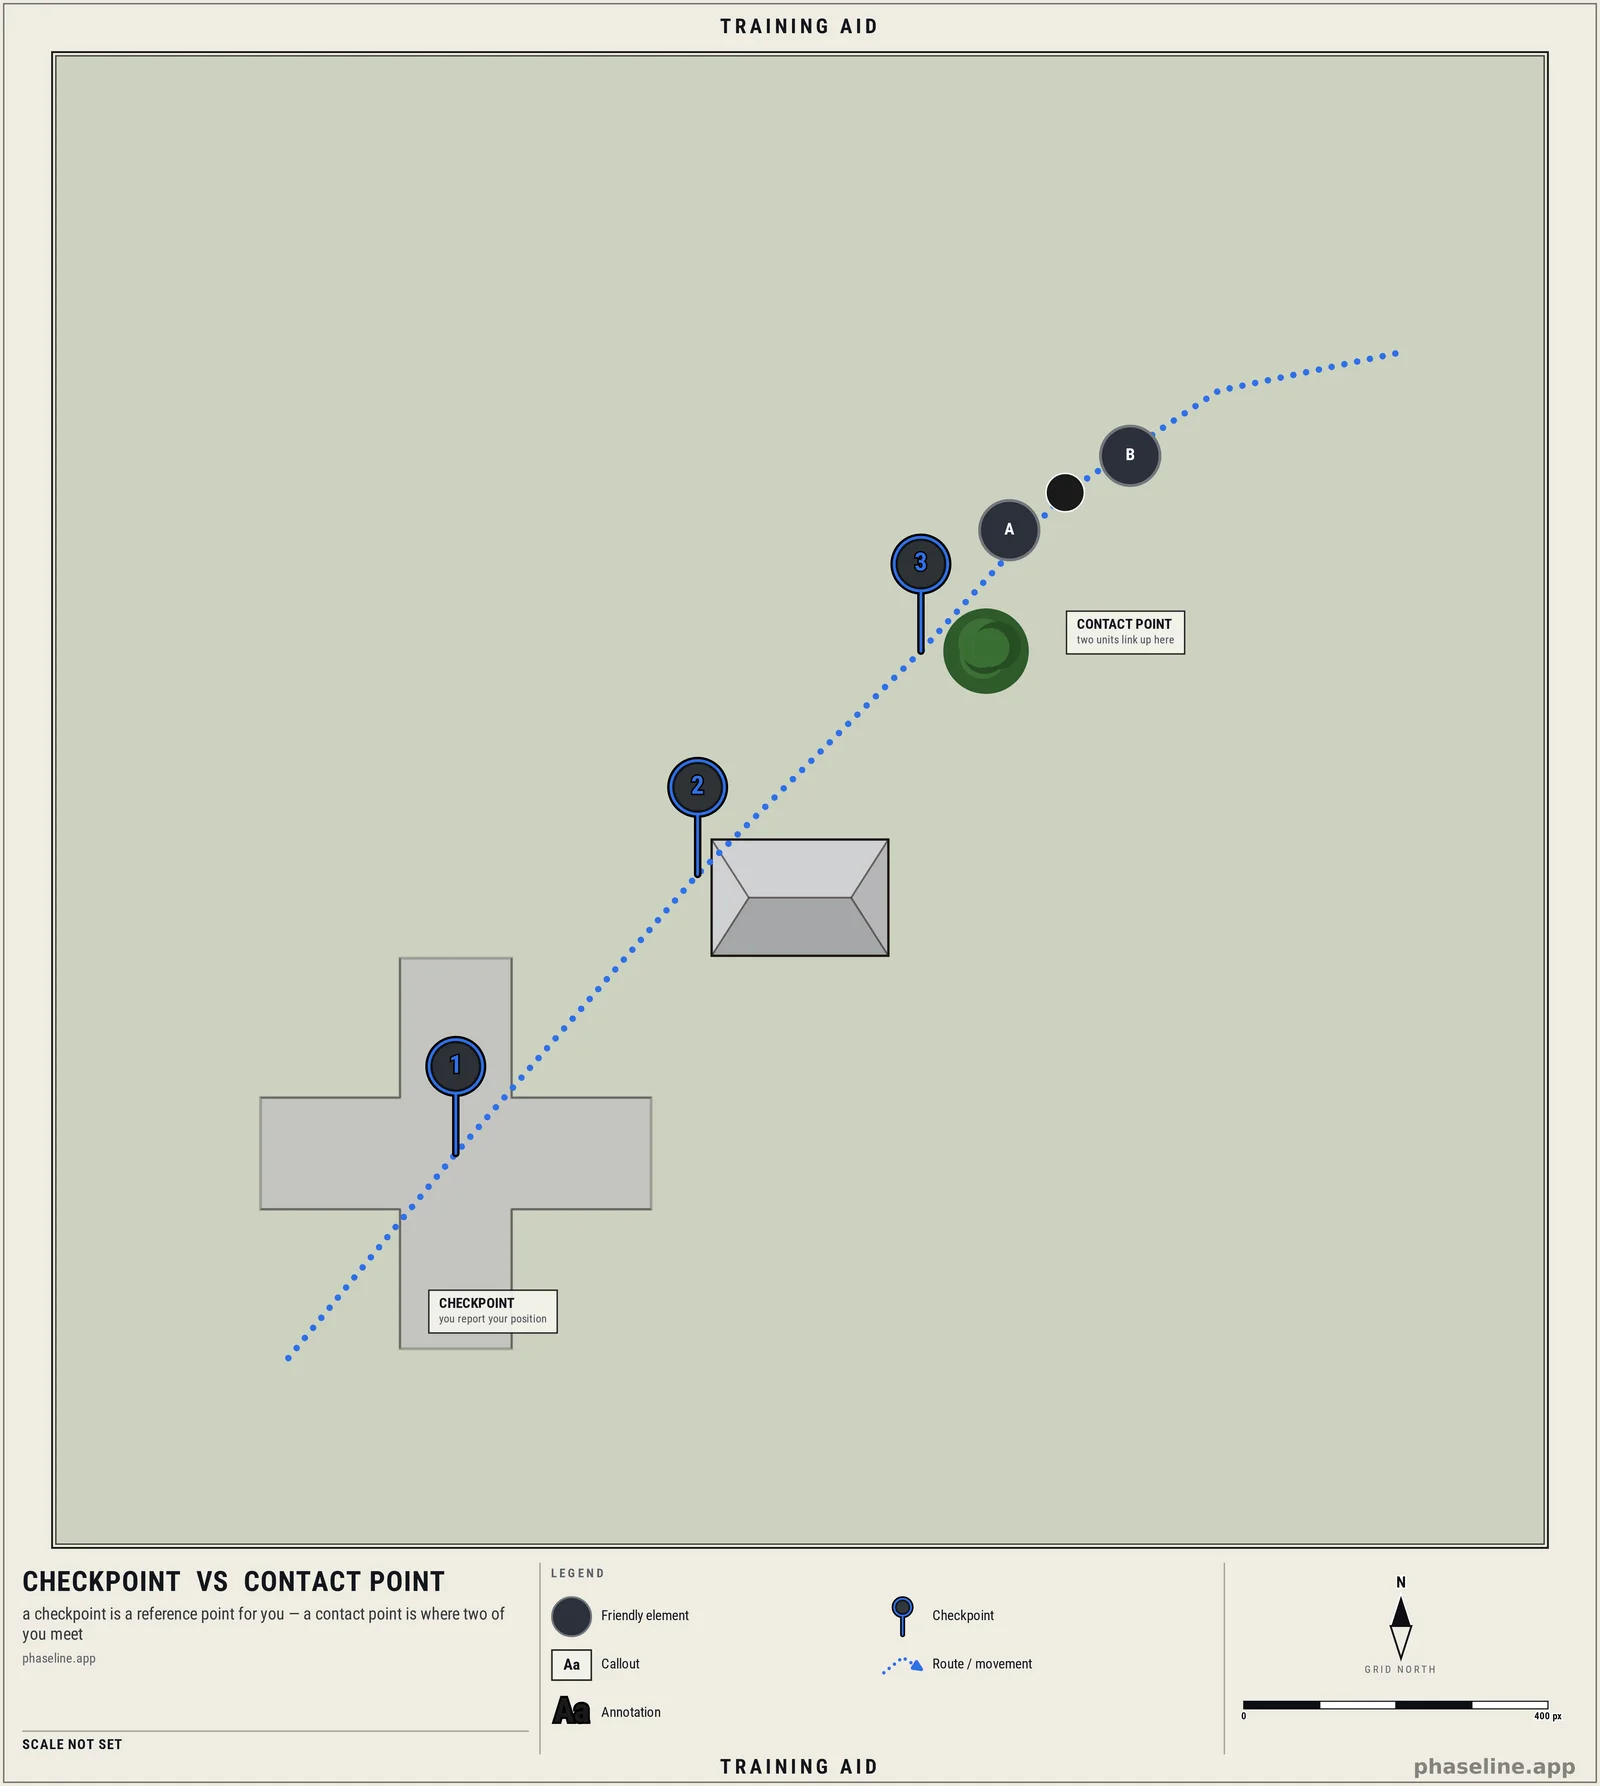
A checkpoint is a predesignated, easily identifiable point used to control movement and to report position — "at CP 3" is faster and more secure than reading a grid over the net. A contact point is subtly different: it is where two units are ordered to physically make contact and coordinate — the designated handshake between adjacent or passing forces.
Rally Point (RP)
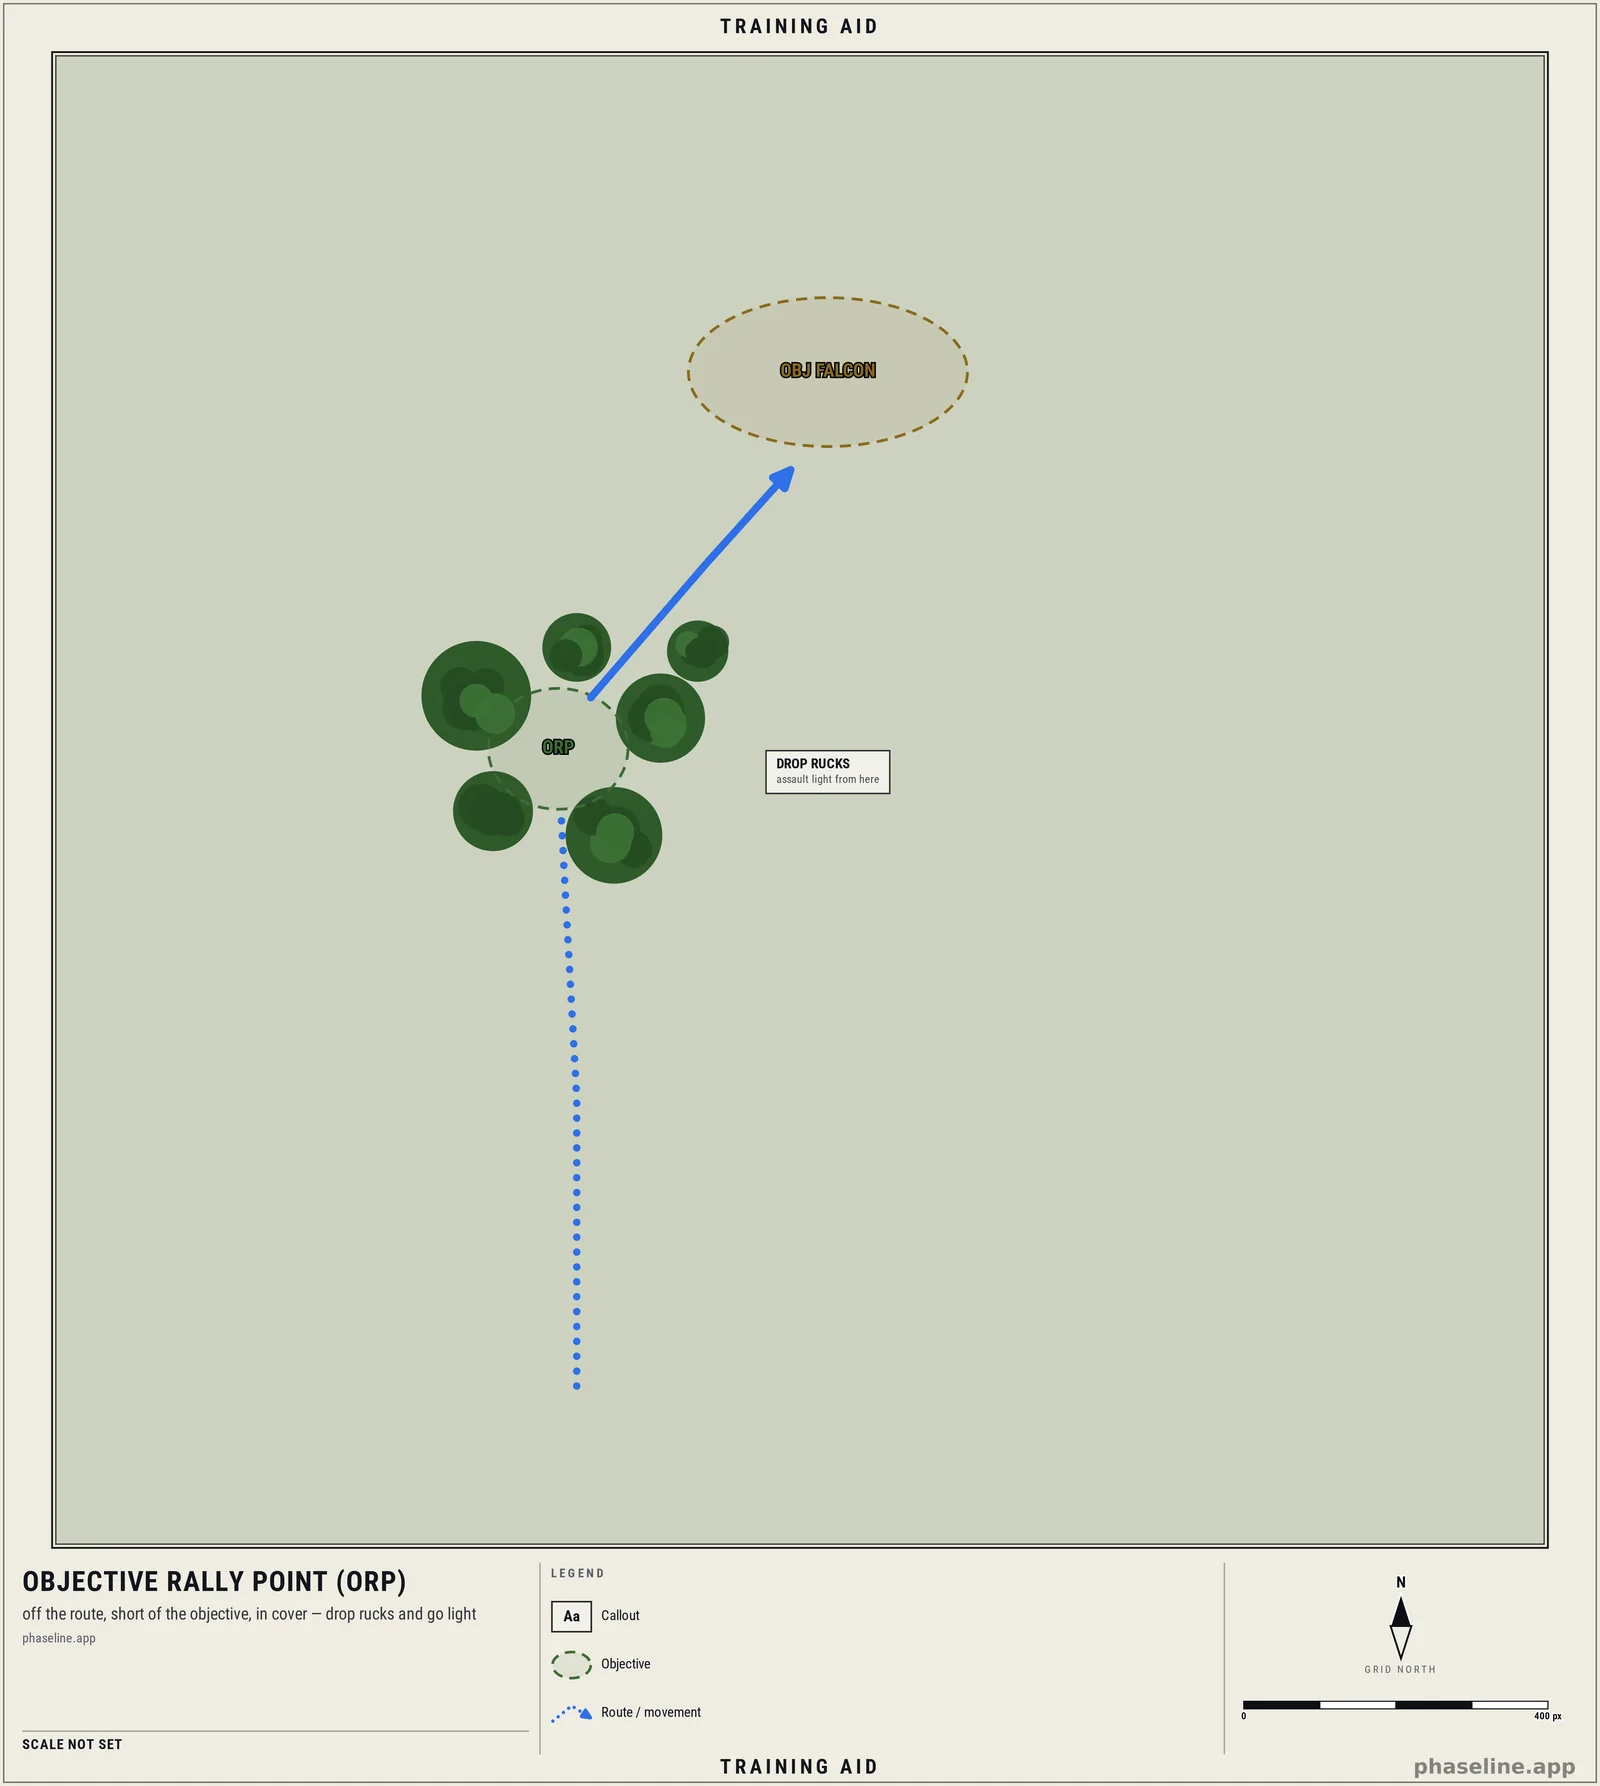
A rally point is where a unit reassembles if it gets split — by contact, by darkness, by a blown crossing. Named in advance and briefed to everyone, it turns "we scattered" into "we regroup at RP KESTREL." An objective rally point (ORP) is the specific version sited short of the objective, where a patrol makes its final preparations.
Target Reference Point (TRP)
A TRP is an easily recognisable point on the ground — a lone building, a road junction, a burned-out hulk — used to control and distribute fires. It is the anchor for calling for fire ("from TRP 1, left 200") and for handing sectors between weapons without a map. TRPs are what make an engagement area work in practice rather than just on paper.
4. Arrows — they dictate direction
An arrow control measure controls the how of movement, and the amount of freedom the subordinate keeps.
Route, Axis of Advance, and Direction of Attack
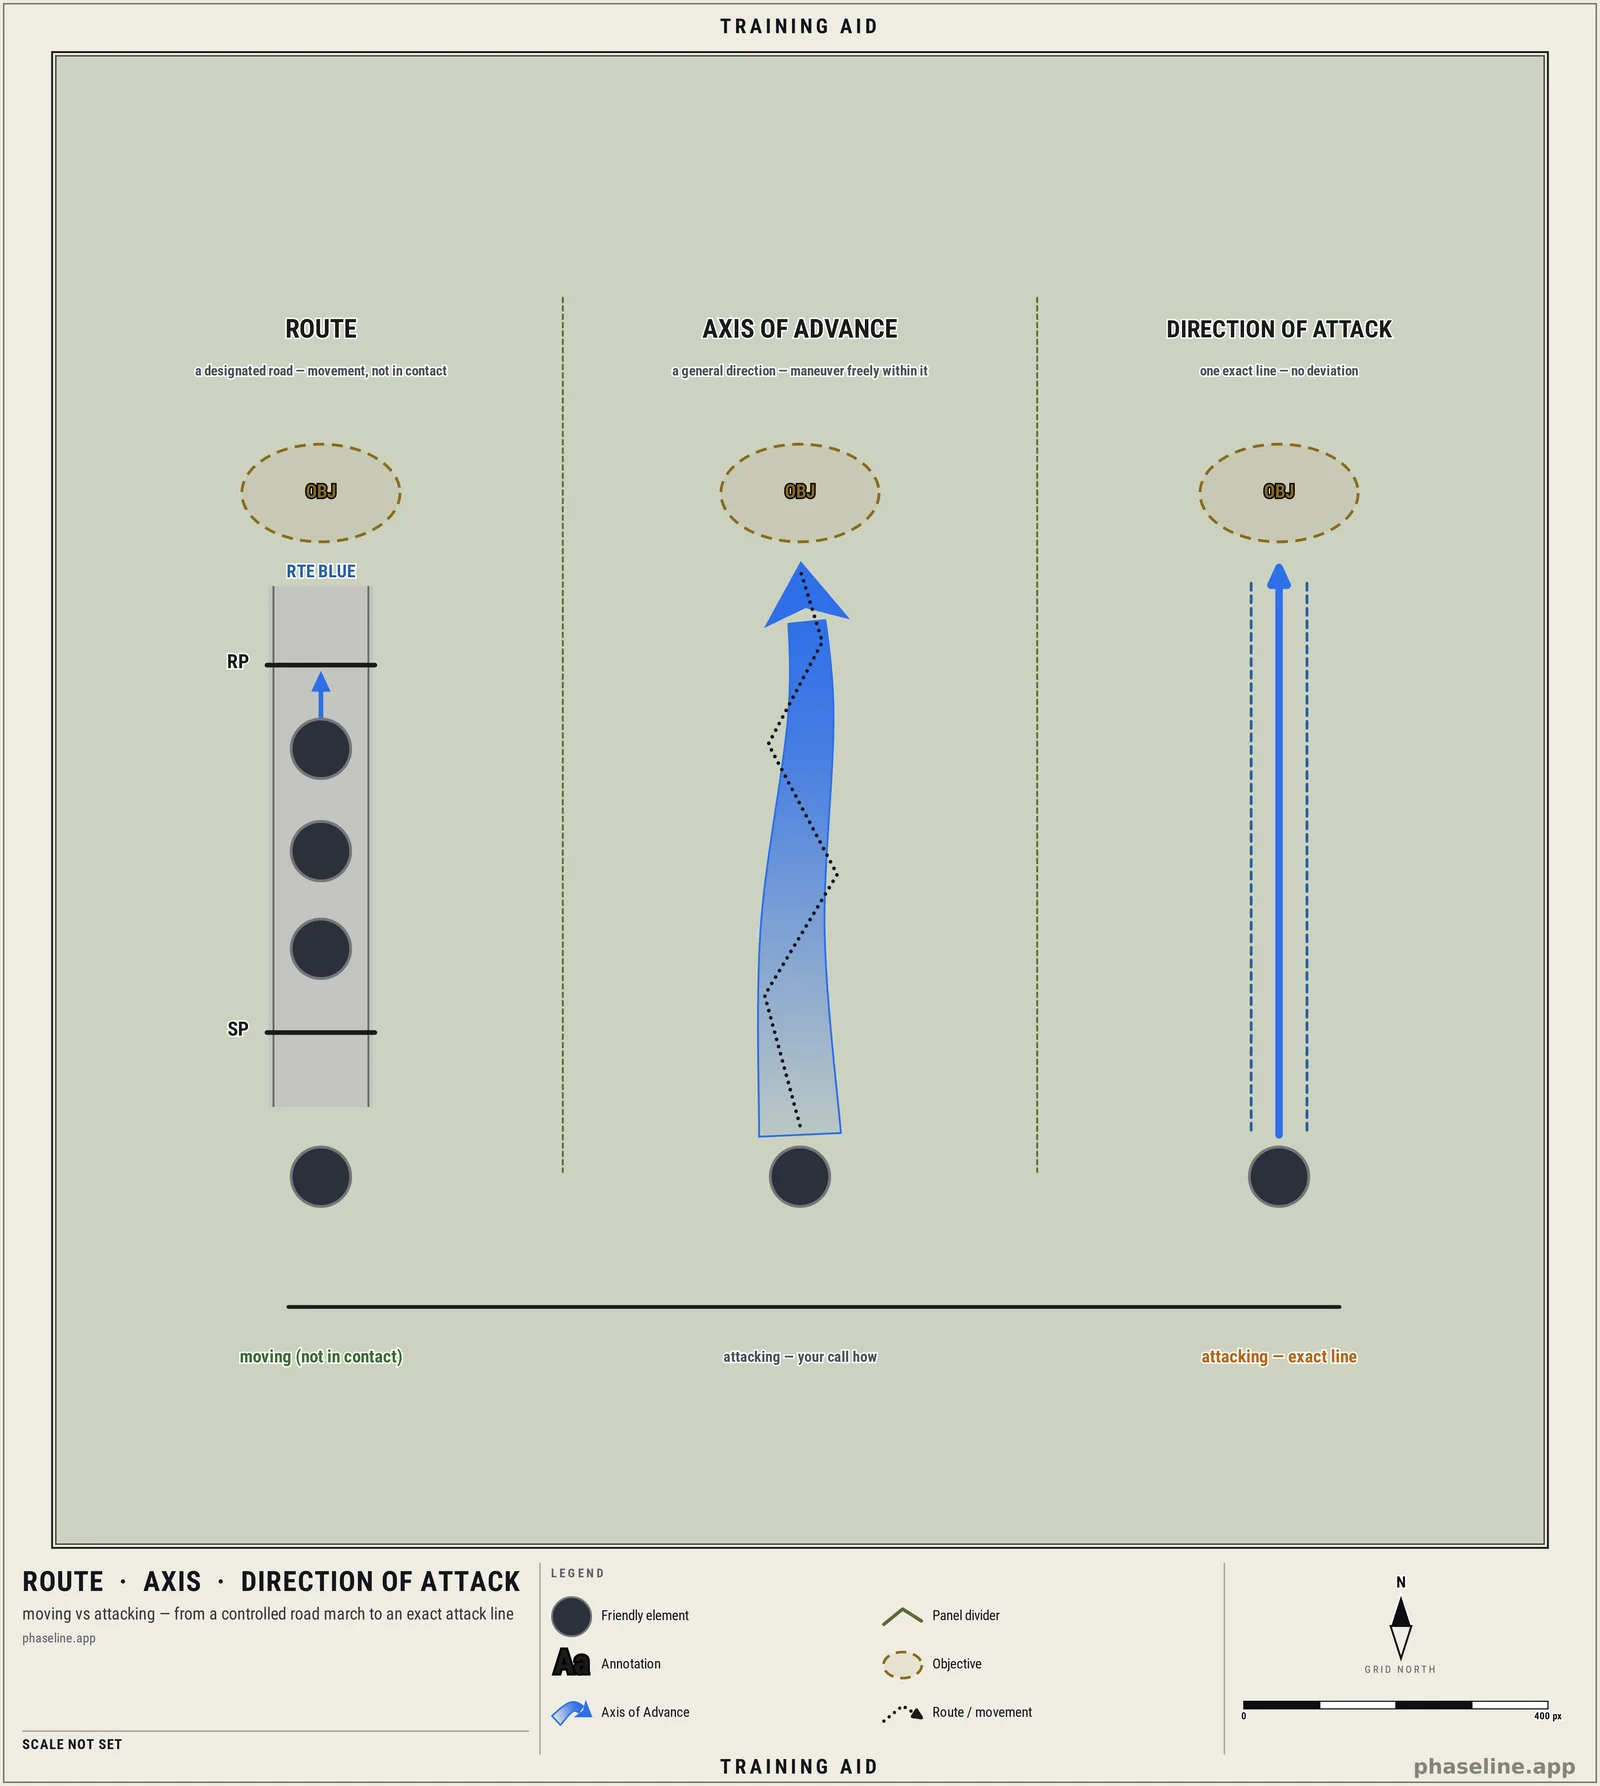
They are easy to confuse but do different jobs, from controlled movement to a dictated attack:
- A route is for movement, not contact — a designated road (or line) with a start point and release point so a march or convoy stays on one controlled, deconflicted path. It is traffic control, not an attack graphic. That is exactly why you don't just use an axis instead: an axis would licence the column to wander off the road and throw away march discipline.
- An axis of advance is the loose end of attack control: a general direction, drawn as a broad arrow, that orients the attack but lets the subordinate maneuver freely within it to bypass strongpoints. It is guidance.
- A direction of attack is the tight end: a specific arrow the unit must follow exactly, used to guarantee coordination — a night attack, a passage of lines — at the cost of the subordinate's initiative.
Choosing between an axis and a direction of attack is the tactical decision: how much freedom can you afford to give away for the sake of control?
The point of all of it
Every one of these measures buys the same thing: shared understanding that survives silence. A boundary keeps you from shooting a friend when you can't reach them on the net. A phase line synchronises two units that never speak. A TRP masses fires without a fire-direction conversation. The map does the coordinating so the radio doesn't have to.
That is also why they have to be drawn consistently. A boundary that looks like a phase line, or an objective drawn as a dot, is worse than nothing — it coordinates people onto different pages. The value is entirely in everyone reading the same mark the same way.
Draw them yourself
Every diagram in this post was made in Phaseline — a free, browser-based top-down editor built for exactly this: laying phase lines, boundaries, objectives, checkpoints and TRPs onto a map or painted terrain, stepping through an operation phase by phase, and exporting clean briefing graphics.
- Draw the four shapes with dedicated tools for lines, areas, points and arrows, in a consistent house style.
- Look up each tool in the handbook: Phase lines and Boundaries show how to draw, name and change them.
- Step through phases to show movement across your control measures without cluttering a single frame.
- Export and share the finished overlay straight into your briefing or your group's Discord.
Open the scene from this post in Phaseline and start marking up your own ground.